Step 1: Pick a template
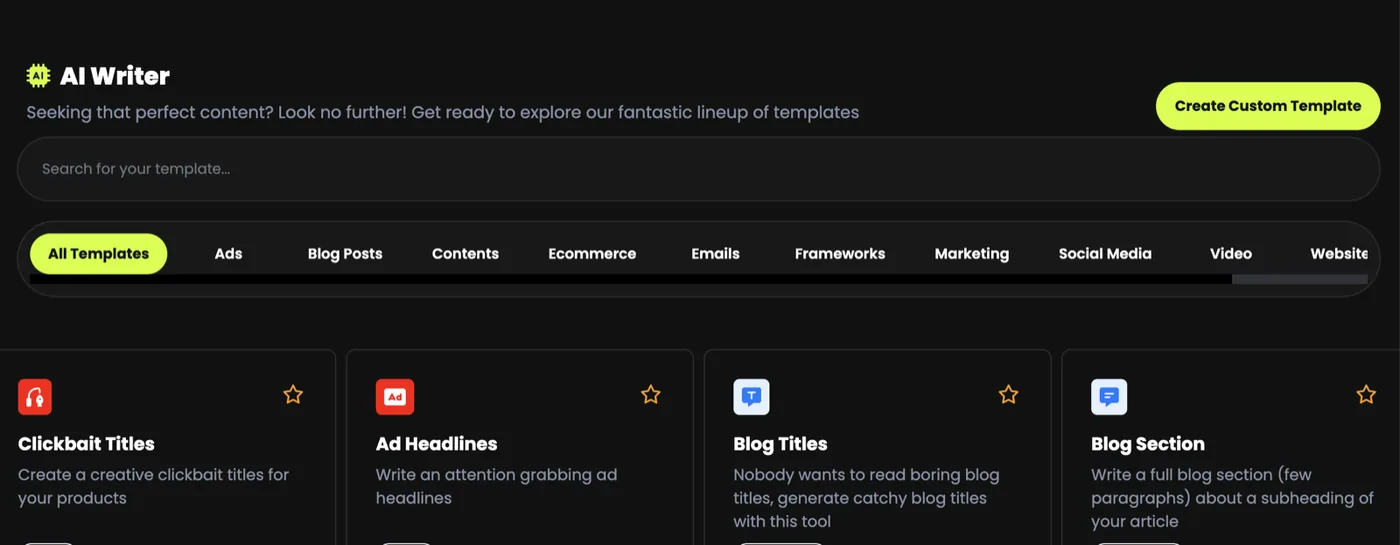
AI Writer lives in the app: sign in and open it from the dashboard. The templates are grouped into categories along the top (ads, blog posts, contents, e-commerce, emails, frameworks, marketing, social media, video and websites), with a search box, and every card has a star for the ones you use each week.
- Article Generator turns a title and an outline into a complete article.
- Blog Titles, Blog Intros, Blog Section and Blog Conclusion build a post piece by piece, so you can steer each part.
- Blog Ideas helps when you know the topic but not the angle.
- Ad Headlines gives short variations to test against each other.
Step 2: Describe what you are writing
Every template opens the same way: a short form on the left, and a document editor on the right where the writing lands.
Fill the main field in two or three sentences. The more specific you are about who it is for, the less generic the result.
A vitamin C face serum for dull, tired skin. Lightweight, non-greasy, visible results in two weeks. For women in their thirties who want a simple routine.
Choose the Language of the result: it can differ from the language you type in.
Step 3: Set the model, creativity and tone
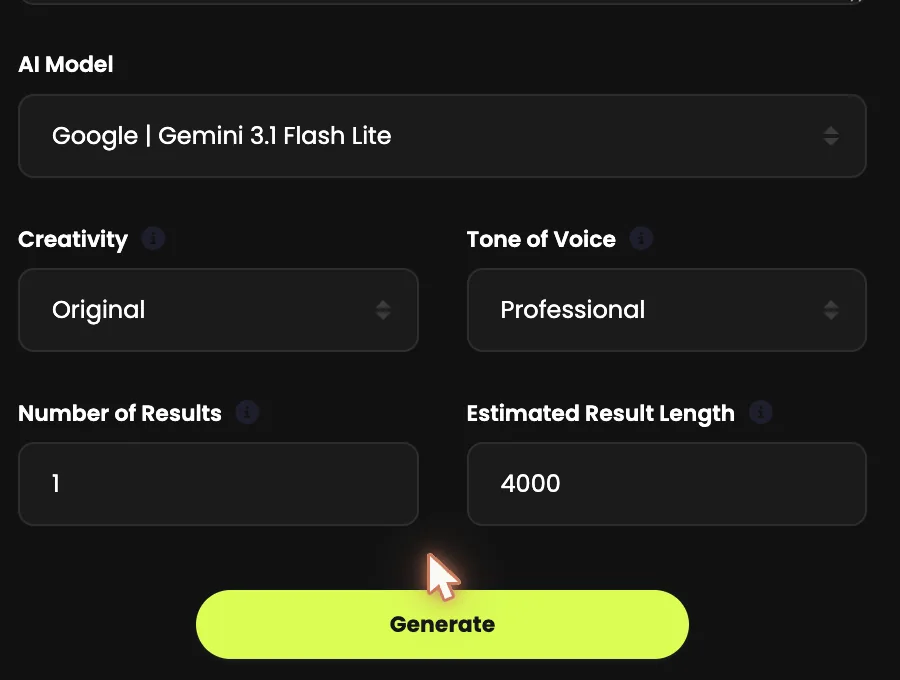
- AI model: the same models as AI Chat. A fast model for drafts and bulk work; a premium one when the writing carries your name.
- Creativity: low for product facts and technical copy, higher for headlines and social posts.
- Tone of voice: professional, casual, persuasive, friendly and more. When copy sounds wrong rather than being wrong, tone is almost always the fix.
Step 4: Ask for three versions
Number of results starts at 1. Set it to 3 and you get options to choose between; the best line often comes from stitching two of them together.
Estimated result length keeps the result near what you need. Longer results use more word credits, so set it close to the length you want.
Press Generate and the copy is written straight into the editor.
Step 5: Finish it in the editor
The editor is a real one: headings and paragraph styles, bold, italic, underline, alignment and lists, so you can finish the piece where it is.
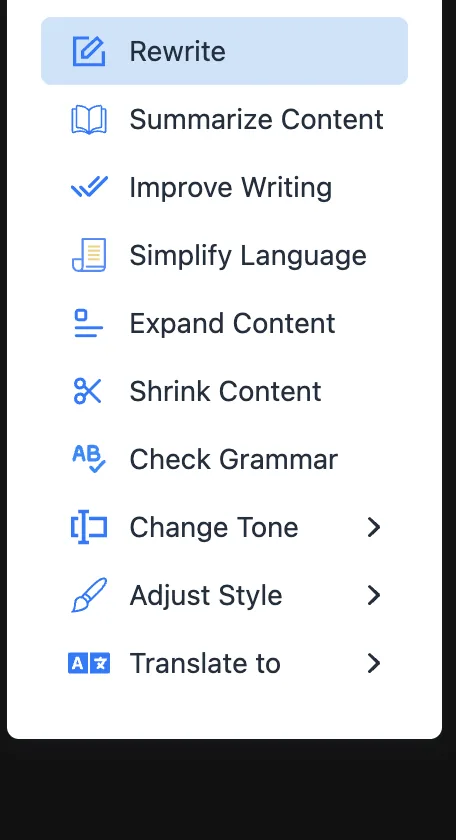
Select some text and open the wand in the toolbar for the AI actions: Rewrite, Summarize, Improve writing, Simplify language, Expand, Shrink, Check grammar, Change tone, Adjust style and Translate, or tell the AI in your own words how to change it.
This is how to finish a piece: not by generating it again, but selection by selection. Expand the thin paragraph, shrink the rambling one, change the tone of the opener, check the grammar. It is faster, it costs less, and you keep everything that was already good.
Step 6: Save it, file it, export it
Name the document and file it in a workbook with the drop-down beside the name: one workbook per client, per campaign or per project. Everything you write is saved under Documents in the sidebar.
Export gives four ways out: copy the text, copy it as HTML for a website or an email builder, download a text file, or download a Word document.
Better copy, fewer credits
- Edit, do not regenerate. If 90% of a draft is right, fix the other 10% with the wand.
- Build long posts in pieces. Titles, then the intro, then each section: you steer every part.
- Internet access, on the MAX plan: switch it on above the editor when a piece depends on recent facts, and check any figure before you publish it.
- Star your regulars so the templates you use every week are one click away.